Carbon fiber composites are materials made from carbon fibers and a polymer matrix, typically epoxy. Carbon fibers are thin strands of carbon atoms that are extremely strong and lightweight. They are made by heating synthetic fibers, such as polyacrylonitrile, and then carbonizing them at high temperatures.
Carbon Fiber Composites,Fiber Composites,Forged Composite,Cfrp Composite Jiangyin Phecda New Material Technology Co., Ltd , https://www.phecdacomposite.com
sew + tell: claire’s hollywood trousers
Today I’m thrilled to introduce you to Claire, who’s visiting us again from the Advisors Circle. If you’ve been following along, you might remember her from her previous visit when she shared her Weekend Getaway Blouse with Bias Bound Edges. This time around, she’s back to talk about her latest sewing adventure—her take on the Hollywood Trousers from Liesl + Co. Let’s hear what she has to say!

---
**Name:** Claire
**Where can we find you online?** Blog, Instagram
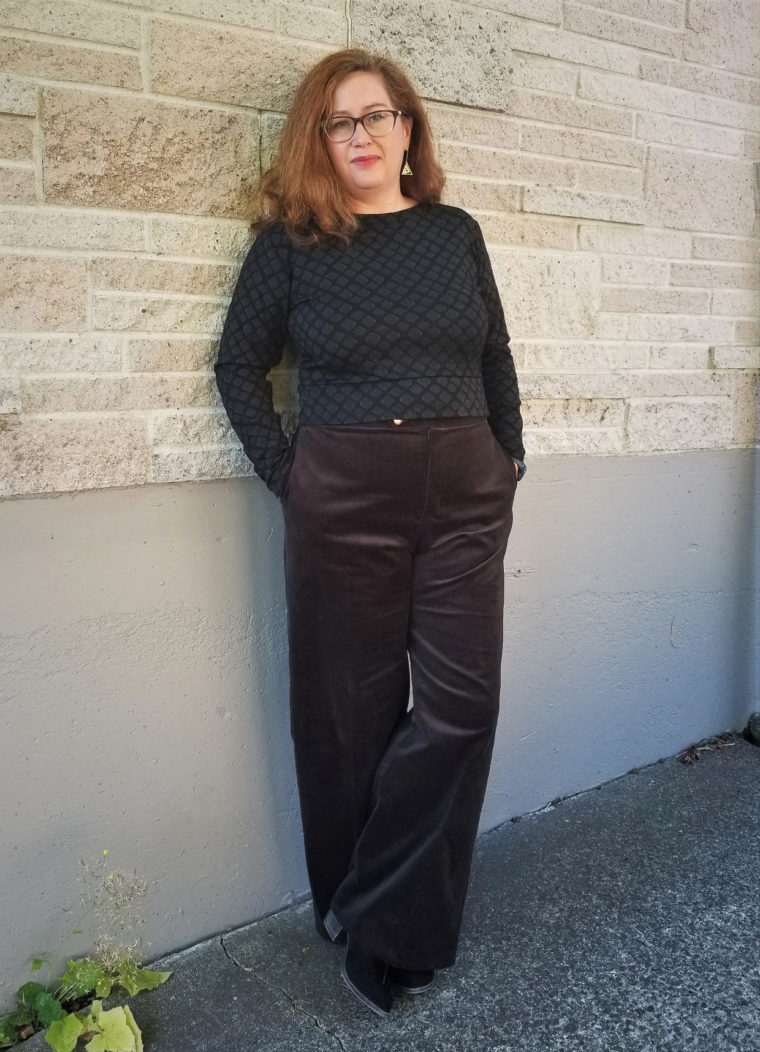
I recently tested the Hollywood Trousers for Liesl and fell in love with their fit and finish. For the initial version, I used a brown corduroy and stuck closely to the original pattern. But after wearing them, I realized I wanted something a bit more casual, especially since I’m a mom of a lively three-year-old. Practicality is key, but I still wanted to maintain some style. After all, no one wants to sacrifice comfort for fashion—or vice versa!
---
**My Plan**
When it came to making adjustments, I only planned minor tweaks from the first pair. Honestly, after a summer of indulging in delicious food, I needed to grade up slightly around the waist and stomach, so I adjusted the rise by about half an inch—a common tweak for me. My main focus was narrowing the legs a touch and modifying the pockets. For a more relaxed vibe, I swapped out the internal pockets for external patch pockets. And because every mom needs extra storage, I added another pair of pockets to the back. You know, just in case you need to carry snacks or toys!
---
**Fabric**
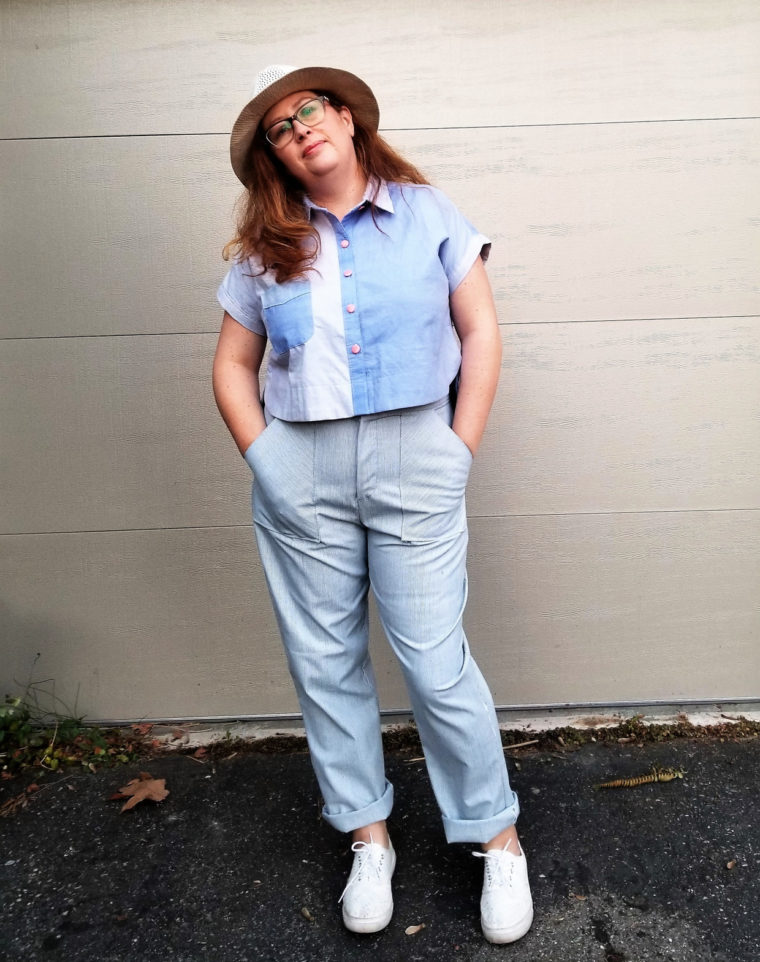
I pulled out a mystery twill from my stash that I got from a fabric swap. It’s sturdy and doesn’t drape much, which I thought would work perfectly with the slimmer silhouette. Unfortunately, this fabric doesn’t photograph well, so you’ll have to trust me when I say it has a subtle blue stripe. To add some visual interest, I cut the front patch pockets on the bias. I think it adds a nice contrast to the stripes, breaking up the monotony.
---
**Pockets**
A few days ago, Camelia shared a fantastic tutorial on creating patch pockets, and while my method wasn’t as scientific as hers, I did take inspiration. Her post is worth checking out if you’re unsure where to start. Essentially, I sketched the basic pocket shape, played around with it until I liked the proportions, and then cut two identical pieces. These new patch pockets replaced the pocket bags, facings, and linings entirely, simplifying the construction process significantly.
Before stitching them onto the front leg pieces, I serged the edges and folded them neatly, edge-stitching the sides that wouldn’t be caught in the side seams or waistband. This included the diagonal opening, the longest straight side, and the bottom of the pocket.
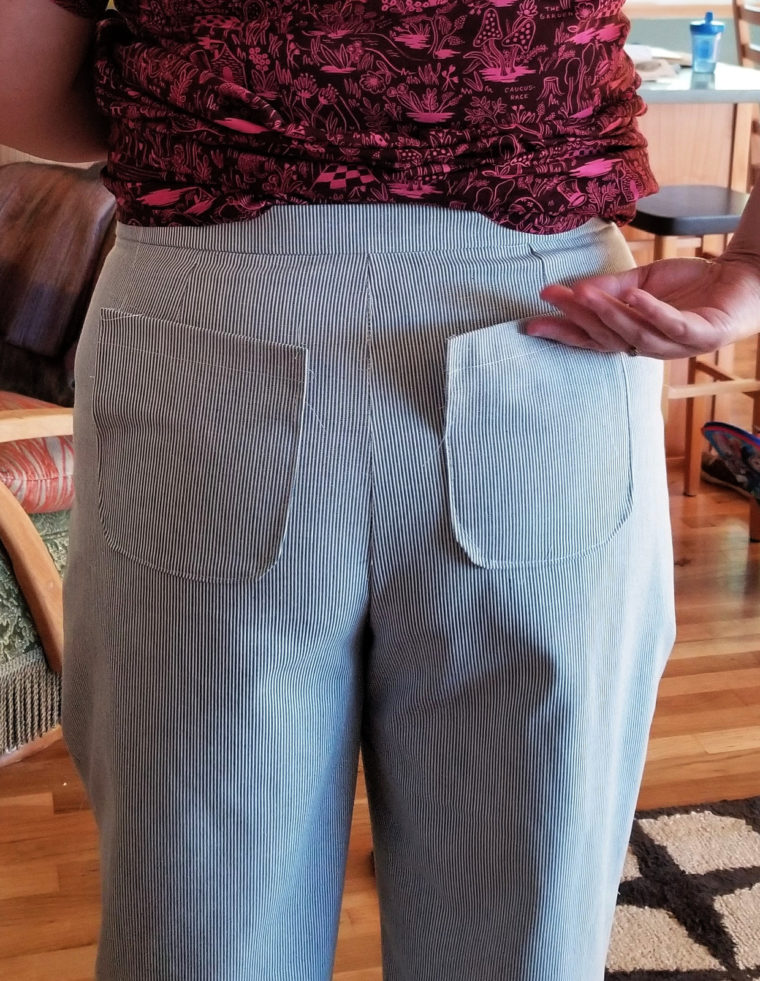
For the back pockets, I went with my go-to patch pocket design, topstitched the tops, pressed the edges, and basted them onto the back legs. Later, I snapped a candid photo of my behind (yes, you read that correctly!) to experiment with pocket placement. Trust me, it’s crucial! For me, placing the pockets slightly closer together and higher than expected worked surprisingly well. While they may look odd on flat fabric, once the trousers wrap around my hips, they look just right. I recommend experimenting with different placements if you haven’t already.
---
**Trouser Legs**
Following Liesl’s advice, I started adjusting the legs at the knees. Early on, I pinned the trousers together and experimented with the width until I achieved a pleasing fit. Instead of going for skinny legs, I aimed for a subtle narrowing of about two inches on each side of the knee. Below the knee, I kept the legs relatively straight to avoid any flares or tapers. Up top, I reshaped the hips without altering anything above them, aiming to preserve the balance of the trousers. It took some trial and error, but eventually, I was satisfied with the final width.
---
**Styling**
One reason I chose this fabric was its versatility. As you can see, these trousers are versatile enough for both a date night or a casual outing. Paired with a sleek top and heels, they offer just the right amount of elegance. Alternatively, with a quick hem roll-up, they transform into a laid-back, everyday look that suits my personal style. Despite the summery appearance, I’d happily layer these with a cardigan for autumn, and they’re thick enough to keep me warm during colder months too!
---
**Summary**
This project was a blast, and I’m amazed at how small changes and a different fabric can completely transform a garment. The Hollywood Trousers are incredibly adaptable, and I can’t wait to see what other versions the sewing community creates. Happy sewing, everyone!
---
(If you enjoyed this post, don’t forget to check out the related articles below!)